Creating a Google Cloud Project
A Google Cloud project is like a container that organizes your work, including data, resources, and applications. Every action you take and every service you use in Google Cloud will live inside a project.
Step 1: Go to the Google Cloud Console
-
Make sure you are signed in to your Google account and open the Google Cloud Console .
-
If this is your first time, you may have a project named My First Project already created. You’ll see it listed in the project selector at the top of the page.
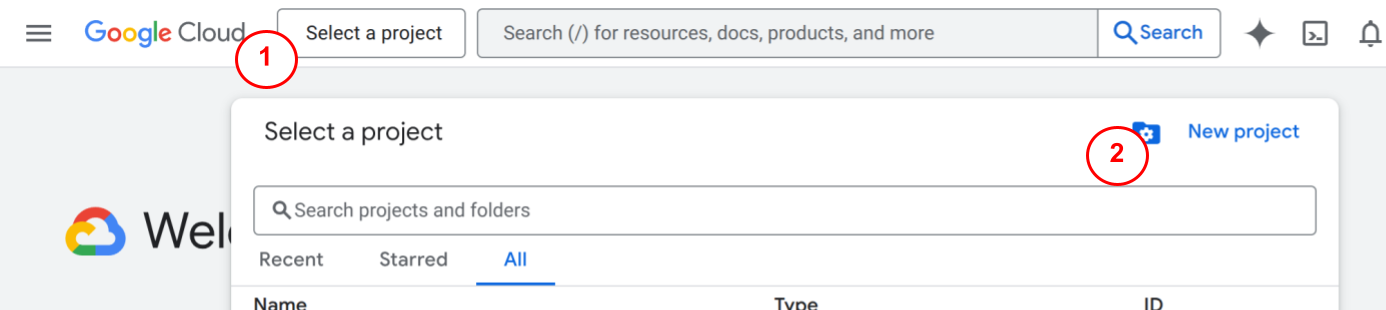
Step 2: Open the Project Selector
-
At the very top of the console, click the drop-down menu showing your current project name.
-
In the pop-up window, click New Project (usually in the top-right corner).
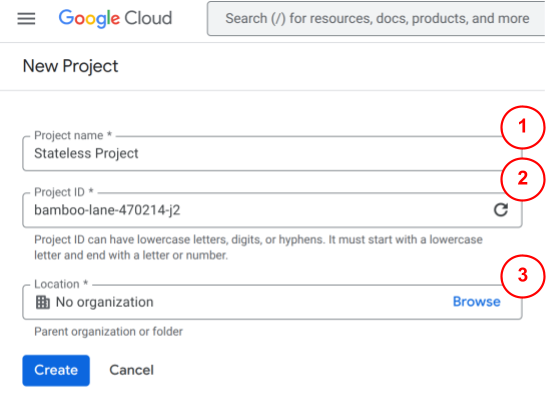
Step 3: Fill in Your Project Details
Now you will define your new project.
-
Project Name: Enter a descriptive name for your project, such as “My Photo Album App” or “My Blog.” You can change this name later if needed.
-
Project ID: As you type the project name, Google Cloud will automatically suggest a unique Project ID. This ID is a permanent, unique identifier for your project across all of Google Cloud. You cannot change the Project ID after the project is created. While you can customize it, the default is usually fine.
-
Location: If you are part of a larger organization, you may need to select an organization. For personal use, leave this set to “No organization”.
Step 4: Create the Project
-
After entering the details, click Create.
-
It may take a few moments… A notification will appear in the top-right corner of the console when it’s ready.
-
Once created, select your project from the drop-down menu at the top of the console to begin working inside it.
Congratulations!
You’ve successfully created a new Google Cloud project.