Creating a Google Cloud Bucket
A Google Cloud Storage bucket is a container for your data. You can think of it as a drive or a folder where you can store files like images, videos, or documents. Every bucket has a name that must be unique across all of Google Cloud.
Step 1: Navigate to Cloud Storage and Create a New Bucket
-
First, make sure you’ve selected the project you created earlier to associate with your new bucket.
-
In the Navigation menu , go to Cloud Storage, then select Buckets, and click the Create button at the top of the page.
-
Name your bucket: Enter a unique name for your bucket. It must be globally unique, which means no one else in the world can have a bucket with the same name. It can only contain lowercase letters, numbers, and hyphens. You will see a red mark if the name is not available or incorrect.
-
Then click Continue.
Step 2: Choose Your Bucket Settings
Here you’ll configure the main settings for your bucket.
- Choose where to store your data:
- Region: Choose a single region (e.g.,
us-east1) for the lowest latency and best performance in that location. - Dual-region: For higher availability and durability, choose two regions.
- Multi-region: For global availability, choose a multi-region location like
USorEUROPE.
- Choose a default storage class for your data:
- Autoclass: This is the easiest option for beginners! When you enable Autoclass, Google automatically manages your storage classes for you. It automatically moves files you rarely access to cheaper storage, and returns them to
Standardwhen needed. - Standard: Best for data that is accessed frequently, like website assets.
- Nearline: For data accessed less than once a month, like backups.
- Coldline: For data accessed less than once every 90 days, like archives.
- Archive: For data accessed less than once a year, with the lowest storage cost.
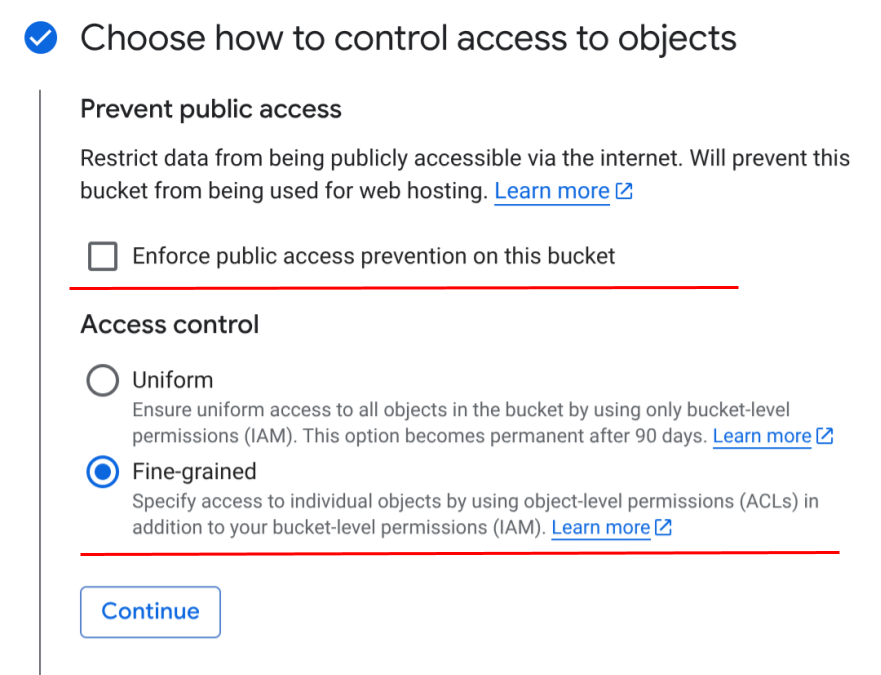
- Choose access control:
-
Under Prevent public access unselect Enforce public access prevention on this bucket. WP-Stateless ensures your media files are available online for your visitors to see. Public access is read-only, meaning files can be viewed but not changed, keeping your website secure.
-
For Access Control, select Fine-grained. WP-Stateless uses object-level permissions by default, and this option ensures backward compatibility. WP-Stateless also supports Uniform access control, but it requires a extra configuration.
- Protection tools: You can also enable additional features here, like versioning to keep track of changes to your files. These options do not affect WP-Stateless functionality.
Step 3: Finalize and Create
After selecting your options, click Create.
It may take a few moments for the bucket to be created. Once it’s done, you will see it in the list of buckets for your project.
Congratulations!
The bucket has been created successfully. With this in place, you’re ready to move on to the next part of the setup.